

Proffesional Christmas Tree Ribbon Decorating


How to add ribbon to a Christmas tree: the ultimate step-by-step guide to decorating your Christmas tree with ribbon for a professional, high-end look including bows, tips for wired and unwired ribbon, along with diagonal, horizontal and vertical techniques.
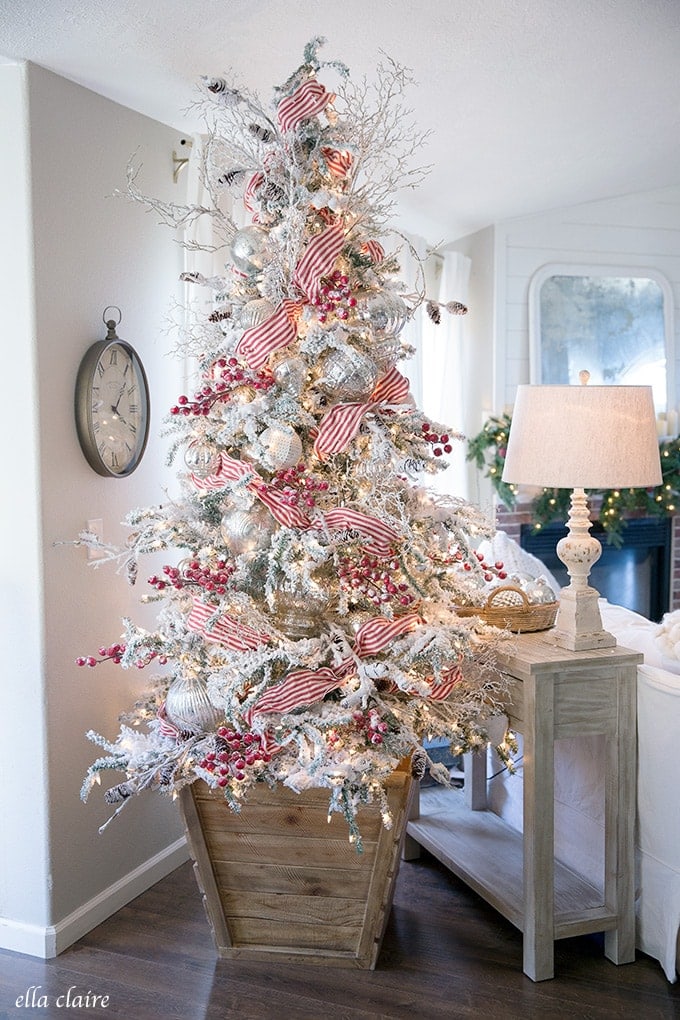
The question I am asked most frequently is "How do you add ribbon to your Christmas tree?" (also how to choose and buy an artificial flocked Christmas tree and also how to set up and fluff an artificial Christmas tree) and I am going to share all of my best tips and tricks with you today! These tips are for both real and artificial Christmas trees, but If you are looking to change up or refresh your tree this year, check out my tutorial for how to flock a Christmas tree!
Whether it is a green tree, a flocked tree (here are 25 beautiful flocked trees ideas by the way), or a tinsel tree, this step-by-step tutorial will help you get your Christmas tree ribbon the way you want it to look.
Before we begin, you may want to check out my post on
Why add Ribbon to a Tree?
- First, it is beautiful! It adds an elegant movement to the tree that ornaments and other objects just can't.
- Second, it is budget-friendly! You can make your tree look much fuller for less money when you fill some of it with ribbon.
- It is easy to change out with changing styles and trends, or just when you feel like something different. I recommend investing in neutral ornaments that you can use from year to year and adding your color and personality through ribbon!
Where to buy Christmas Tree ribbon
Another question I am asked frequently is "Where do you buy your Christmas tree ribbon?" I know, the struggle is real! I always update my Christmas sources page with my favorite ribbons, but finding Christmas tree ribbon can be so challenging at times. Here are my tips:
- Try a variety of places. The places I buy ribbon most frequently include: TJ Maxx, Homegoods, Costco, Hobby Lobby, Michaels, and JoAnn Fabrics. I also always check local shops and boutiques. I keep my favorite Christmas ribbon links updated in my Christmas sources page and also in my Amazon Storefront.
- Look for color and pattern without being too particular about width. I have used anywhere from 1 1/2" to 6" width ribbon on my trees. My main focus is always finding the color and style that will match my decor. I will show you how to use both thin and wider ribbons.
- Don't be afraid to mix and match ribbons! Are you having a hard time finding the ribbon that has everything you want? Feel free to use more than one coordinating ribbon on a tree. This is a great way to add texture and pattern as well.
How much Ribbon for a tree?
How much ribbon you add to your tree will depend on the thickness of your ribbon, the amount of ornaments you use, and the look you are wanting to achieve. It also depends on the size of your tree and whether it backs up to a wall or needs to be decorated completely on all sides.
My technique uses significantly less ribbon than most, while still appearing to have the perfect amount visually.
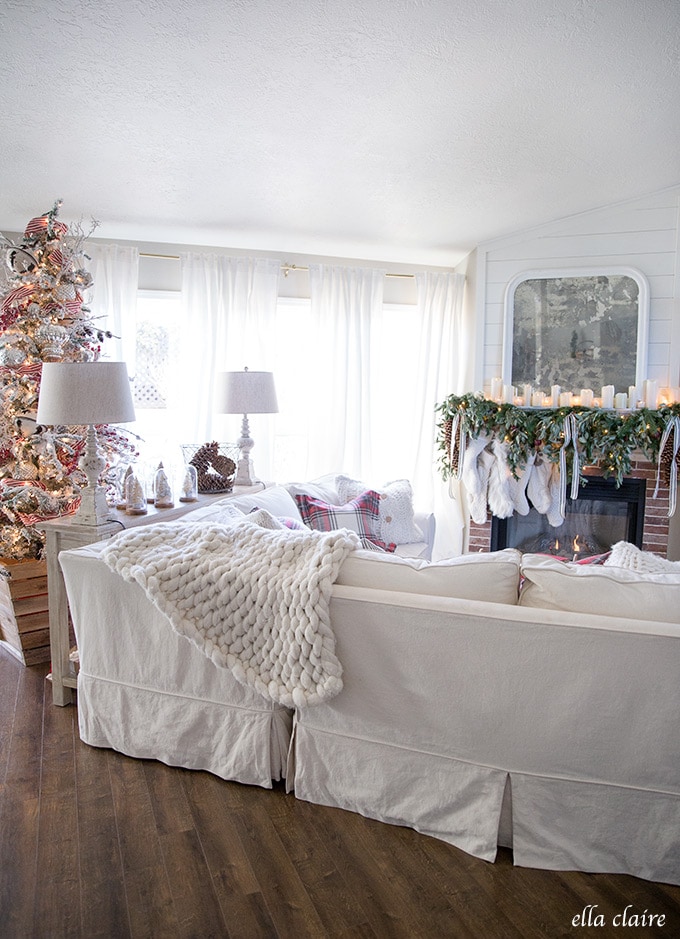
If you want the look of a tree dripping with ribbon, you will need more and if you like it more sparse, you will need less. But, to give an example, the ribbon amount that I prefer for my main tree is approximately 2, 30 ft. rolls for my 7 1/2 ft tree.
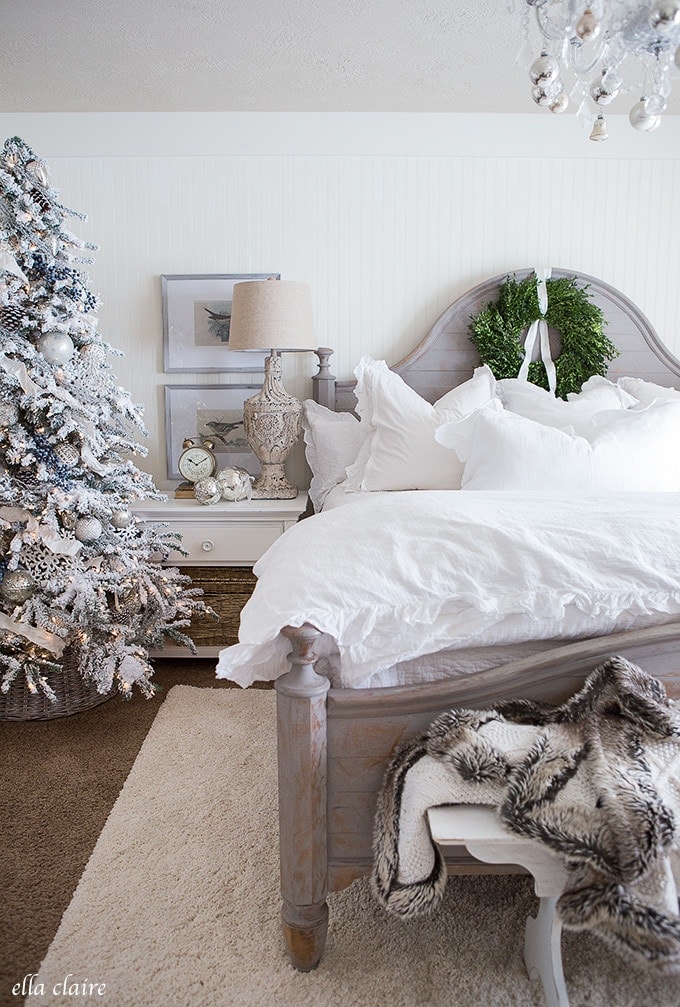
My main tree is usually about 90% decorated as there is a very small sliver on the back that can't be seen. With that said, I do bounce and tuck the ribbon around the sides of the trees for the most part. The tree in my bedroom, for instance, I use about 1 roll because I don't decorate the entire back half of the tree.
How to Add Christmas Tree Ribbon
Step 1: Fluff the Tree and Test the Lights
The first step is preparing your Christmas tree for ribbon is to fluff the branches, and check the lights to make sure they are working properly. I know, I know. This step might be the least exciting, but it is arguably one of the most important steps.
When the tree is fluffed and pretty it ensures all of the ornaments and ribbon lay nicely. You can see my post and video on how to set up and fluff artificial trees for the most comprehensive tutorial and best tips.
Be sure to keep these important things in mind:
- Secure the base in the location you want and plug in the lights.
- Add the first section, testing the plugs and lights as you go.
- "Fluff" section by making sure all of the branches are separated and not smashed.
- Repeat until tree is completely assembled.
Step 2: Add Large Ornaments and Decor
I have discovered, after a many years of trial and error, that adding ornaments before the ribbon creates the best end result. There seems to be some controversy on this, but I will break down how I do it so you can see why it just works better!
There are two big reasons to add ribbon to your tree after the ornaments. First, it will save time and money, and second, it is easier to control the flow and direct
I wrote a post all about how to decorate a Christmas tree with all of my best tips and secrets, including ornament placement, but here is the abbreviated version:
- Start with any picks, berries, floral stems, branches.
- Add tree topper, large ornaments and large tree decor.
- Add ribbon (follow tutorial below).
- Lastly, add smaller ornaments, anything super delicate, anything that clips to the branches, and tinsel if you choose
Note: If you are using a very thin ribbon or tying ribbon into bows on the branches, you will add those at the very end, saving only the most delicate ornaments, if needed, for afterward.
Step 3: Cut Ribbon into Strips
This is one of my little secret tree decorating tips that I swear by. Cut up that roll of ribbon into 3- 5 ft. manageable strips!
It seems people are afraid of cutting into ribbon, like they will ruin it. Many people start at the top of the tree and wind their way all the way down to the bottom. While I think that can be a fun look, it eats up much more ribbon than my technique. I also just prefer the look of a more organic and random application with my ribbon.
Instead, I bounce and weave these smaller lengths of ribbon which achieves this elegant and professional look I love.

Step 4: Bounce, Loop and Tuck ribbon
There are many ways to add ribbon to your Christmas tree, but this technique is my favorite, the easiest, and the one that produces the most beautiful tree. I mostly use wired ribbon, but I will include my favorite non-wired techniques as well.
If you prefer horizontally wrapped ribbon, you can use the same techniques, modifying them to the direction you wish for them to go.
If you are more of a visual learner, you'll want to be sure to watch the video above to see how to add ribbon to a Christmas tree.
Wired Ribbon
- Start at approximately eye level, or a little bit higher, and nestle one end of your ribbon into a natural opening between ornaments. You will not need to do anything extra to tie or secure your ribbon into the tree. It should stay in place. If it needs a little extra support, nestle it in between the smaller pieces of a branch.
- Bounce the ribbon diagonally down and to the left (or right, depending on where you have other holes in the tree. I usually go to the left for my first piece)
- Tuck in each point the meets the tree, creating a bouncing or jumping effect. Tip- let the ribbon naturally crinkle and wave for a more organic feel.
- Repeat the bouncing and tucking 2 or 3 times until you reach the end of your first piece of ribbon.
- Tuck in the end of your piece of ribbon the same way as you did the beginning.
- Find another hole in the tree close to the middle of your first ribbon and that is where you will begin your second piece. Tip- for the most professional result, you will want to look at the tree as a whole, wrapping and bouncing the ribbon onto all sides that can be seen.
- Repeat the above steps to create the bouncing effect, this time going down and in the opposite direction (to the right for me). The goal is to keep the eye moving throughout the tree, creating visual movement, softness, and interest. Tip- you can also apply all of the ribbons in the same (parallel) direction, or in sets of 2 (parallel, opposite, parallel). See below.
- Repeat until your tree is finished. You can add as little or as much ribbon as you want. Just be sure to add it evenly spaced throughout the tree, filling in the natural holes created by my easy ornament spacing technique.
Non-wired ribbon Techniques
While I prefer wired ribbon for my trees, I have had instances where I found the perfect color and style ribbon that wasn't wired. Using these techniques, they are gorgeous in a tree as well!
- Bounce and curl. For this technique, I tuck in my ribbon like I did for the wired version above except as I bounce it around the tree, I turn and flip the ribbon creating a curling look. It is very whimsical and pretty, with a ton of visual movement.
- Bows. Once you have all of your ornaments on the Christmas tree, you can also cut lengths of ribbon to tie bows onto the branches. I generally tie bows and then wire them to the end of the branches so they are easier and look exactly how I want them to. You could also tie lengths directly to the tree itself.
Step 5: Repeat with a Coordinating Ribbon (optional)
At this point, you will want to take a step back to see if there are any bare spots on your tree where the ribbon looks off-balance. If so, you will want to fill them in with small lengths of the same ribbon. It is perfectly okay to cut short lengths that you will only get one "bounce" out of.
If you want to use a coordinating ribbon, I prefer to tuft and tuck them in the general area that I did my first ribbon. I like the way it feels visually to have the ribbons clustered together rather than just alternately evenly spaced throughout the tree. This creates some breathing room and is visually pleasing.
Step 6: Add Remaining Small Ornaments
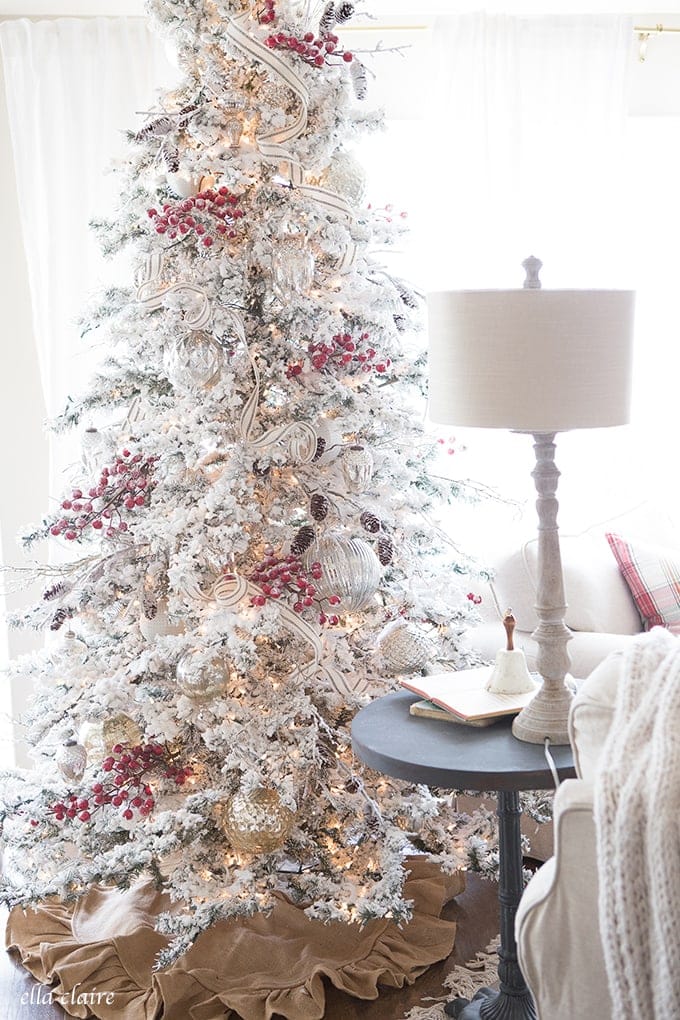
Once my ribbon is all finished, I add my remaining small and delicate ornaments. While the bigger ornaments are more set back into the tree, the smaller ornaments are layered on the outside toward the edge of the branches. This creates the most beautiful depth and richness.
Horizontal, Vertical, or Clustered
By tweaking this tutorial technique, you can customize it to fit your style and preferences. Here are some of my favorite ways to apply the ribbon steps to achieve different looks.

Christmas Tree Ribbon Tips and Tricks
Step away from the tree.
If you are frustrated, just walk away for a while. Resist the urge to do, redo, redo, redo and redo again. You know those times where you are looking at a word and all of a sudden it just doesn't look right, and you are wondering if that is really how it is spelled or if you have just been looking at it for too long? The same goes for your tree. If you look at anything too long, you will think it looks weird. Walk away, and come back later. When seeing it with fresh eyes, you will be able to see what works and what needs to be reworked.
Perfection is overrated, and in this case, your Christmas tree will look better if it isn't perfect!
If you are trying out a trend, do it with ribbon.
My recommendation is to begin a collection of ornaments that you love that will last you a long time. You can collect and add onto these over the years. Mercury glass is mine. I LOVE my mercury glass ornaments and will most likely always love them.
I prefer the neutral base as my jumping off point and then I can get creative or playful with ribbon. Changing out the ribbon every few years is much easier and less expensive than changing out the ornaments.
Use your Coupons
It seems that I usually use between 2 and 5 spools (10-25 yards each) of ribbon for each one of my trees. I love finding unique and textural ribbon which can get expensive, but if you use a coupon they often end up being less expensive than even the cheaper kinds.
Christmas Tree Ribbon Ideas
There are so many things that you can use as Christmas tree ribbon!
I have used garlands, buntings, flags, crystal ropes, sparkly wrap things, tulle, feather boas, mesh, etc. If there is something that really catches your eye or that you really love, build your tree decor around it!
One year I used fabric that I had on hand that I ripped into strips because we didn't really have it in the budget to buy a bunch of Christmas decor. I ended up loving the way it looked. For another tree, I used thick, long strips of wrapping paper that I crinkled up to create a rustic effect for a ribbon.
This is a great mindset to have because it can be very budget friendly. It can also leave the door open for materials with the exact color or style you are looking for.
For more Christmas decor ideas, check out my Christmas trees and easy DIY Wooden Christmas tree box!
Christmas Tree Ribbon Video
Here is a video walking you through the ribbon decorating on a few of my trees!
Feel free to print out this how-to card for easy reference:
How to Add Ribbon to a Christmas Tree
The ultimate step-by-step guide to decorating your Christmas tree with ribbon for a professional, high-end look.
- 1 Christmas Tree Your preference- flocked, green unflocked, tinsel, etc.
- 2 -5 spools ribbon (10-25 yards each)
Prepare and Fluff the Christmas Tree (use this step for artificial tree)
-
Secure the base in the location you want and plug in the lights.
-
Add the first section, testing the plugs and lights as you go."Fluff" section by making sure all of the branches are separated and not smashed.
-
Repeat until tree is completely assembled.
Add Large Ornaments and Decor
-
Start with any picks, berries, floral stems, branches.
-
Add tree topper, large ornaments and large tree decor.
-
Add ribbon (follow tutorial below)
-
Lastly, add smaller ornaments, anything super delicate, anything that clips to the branches, and tinsel if you choose
Cut the Ribbon Into Strips
-
Cut up that roll of ribbon into 3- 5 ft. manageable strips
Wired Ribbon
-
Start at approximately eye level, or a little bit higher, and nestle one end of your ribbon into a natural opening between ornaments. You will not need to do anything extra to tie or secure your ribbon into the tree. It should stay in place. If it needs a little extra support, nestle it in between the smaller pieces of a branch.
-
Bounce the ribbon diagonally down and to the left (or right, depending on where you have other holes in the tree. I usually go to the left for my first piece)
-
Tuck in each point the meets the tree, creating a bouncing or jumping effect. Tip- let the ribbon naturally crinkle and wave for a more organic feel.
-
Repeat the bouncing and tucking 2 or 3 times until you reach the end of your first piece of ribbon.
-
Tuck in the end of your piece of ribbon the same way as you did the beginning.
-
Find another hole in the tree close to the middle of your first ribbon and that is where you will begin your second piece.
*Tip- for the most professional result, you will want to look at the tree as a whole, wrapping and bouncing the ribbon onto all sides that can be seen.
-
Repeat the above steps to create the bouncing effect, this time going down and in the opposite direction (to the right for me). The goal is to keep the eye moving throughout the tree, creating visual movement, softness, and interest.
*Tip- you can also apply all of the ribbons in the same (parallel) direction, or in sets of 2 (parallel, opposite, parallel). See below.
-
Repeat until your tree is finished. You can add as little or as much ribbon as you want. Just be sure to add it evenly spaced throughout the tree, filling in the natural holes.
Non-Wired Ribbon
-
For this technique, I tuck in my ribbon like I did for the wired version above except as I bounce it around the tree, I turn and flip the ribbon creating a curling look. It is very whimsical and pretty, with a ton of visual movement.
-
Bows. Once you have all of your ornaments on the Christmas tree, you can also cut lengths of ribbon to tie bows onto the branches. I generally tie bows and then wire them to the end of the branches so they are easier and look exactly how I want them to. You could also tie lengths directly to the tree itself.
Repeat with Coordinating Ribbon (optional)
-
Repeat steps above with a coordinating ribbon. I prefer to tuft and tuck them in the general area, or moving in the same direction, as I did my first ribbon.
Add Remaining Small Ornaments
-
Add remaining small and delicate ornaments.
-
Add tinsel, if desired. While the bigger ornaments are more set back into the tree, the smaller ornaments are layered on the outside.
Note- If you are more of a visual learner, see the video tutorial!
Note- Skip the first "Prepare and Fluff the Christmas Tree"steps if you are using a live tree.
Note- If you are using a very thin ribbon or tying ribbon into bows on the branches, you will add those at the very end, saving only the most delicate ornaments, if needed, for afterward.
Did I miss anything? I would love to hear your own tips, questions, and comments below! SaveSave SaveSaveSaveSave SaveSave SaveSave SaveSave
As an Amazon Associate I earn from qualifying purchases.
Proffesional Christmas Tree Ribbon Decorating
Source: https://www.ellaclaireinspired.com/10-tips-for-beautiful-christmas-tree-ribbon/
Posted by: bouchertwor1982.blogspot.com
0 Response to "Proffesional Christmas Tree Ribbon Decorating"
Post a Comment